Managing Sessions
The ‘Sessions’ screen provides a list of all sessions (current and past). You can view session information such as the user’s IP address and session duration.
If needed, you can “kill” a session. This may be useful in the rare case of a “hung” session for example.
To assist a user, you may wish to “view” a session. If the user grants permission, a shared session opens.
Additionally, you can export session data to a comma-separated values (CSV) file for download and analysis.
This short guide will show you step by step how to:
- View the sessions list
- Sort sessions
- Filter sessions
- Kill session(s)
- View session
- Export session data
View Sessions List
Using your preferred web browser, navigate to the URL for your Apporto system, for example, “mycollege.apporto.com”, and log in to the system using your credentials.
Click the Sessions ![]() icon in the Navigation Panel.
icon in the Navigation Panel.
The ‘Sessions’ screen displays.

The Sessions screen shows a listing of current (active) and prior sessions for your Apporto system, and provides the following information for each session:
-
SESSION ID: A unique system-generated number to identify the session
-
EMAIL: The email address of the user who created the session
-
IP ADDRESS: The IP address of the user who created the session
-
APP NAME: The name of the app or desktop for which the session was created
-
START TIME: The date and time when the session was initiated
-
DURATION: The length of time for which the session is/was active in minutes
-
STATUS: The current status of the session (e.g., Connected, Disconnected, Disconnected with a poor network detected, etc.)
-
Optionally, your instance can be configured to show the AD username too.
Sort Sessions
The Sessions screen is initially sorted in reverse numeric order by SESSION ID.
You can sort the list by NAME, EMAIL, APP-NAME, START TIME or STATUS.
Click a column header to re-sort the screen in alphanumeric order using the selected column as the sort key.
Click the column header again to sort the screen in reverse alphanumeric order.
Filter Sessions
If desired, you can filter the list to display a subset of sessions.
Click Filter to expand the filter box.
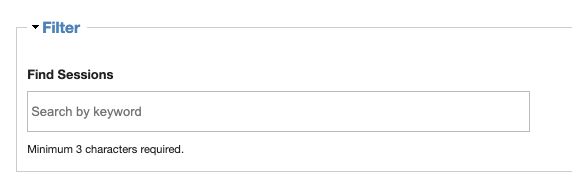
Enter the term you wish to search for in the Contains text box.
![]()
When you search the Sessions list, the system reads the word(s) in your search term as a string of characters (rather than as separate words), and searches for occurrences of the text string anywhere in the selected field. For example, the search term “jo” would include the results “Joe” and “John.”
Click Return
The screen refreshes to display only those sessions that contain your search term.
To remove the filter, simply delete your search term and hit Return.
To view sessions for particular time period, click Filter by date range.

Select the From (starting) and To (ending) dates.
Click Apply
The screen refreshes to display sessions that occured during the date range.
Click Reset to clear the filter.
Kill Session(s)
Kill a Single Session
Locate the active session you wish to “kill”.
Click the Kill option in the ACTIONS column.
![]() The Kill option is available only for sessions with a STATUS of Active or Unknown.
The Kill option is available only for sessions with a STATUS of Active or Unknown.
The ‘Sessions screen’ refreshes to display your changes, and a confirmation message displays.
Kill Multiple Sessions
Select the checkboxes for the session(s) you wish to “kill”.
Click the Kill Session(s) link to expand this option.
Select Kill the selected session(s) from the drop-down menu.
Click Update
The ‘Sessions’ screen refreshes to display your changes, and a confirmation message displays at the top of the screen.
View Session
In order to help troubleshoot a user issue, it may be useful to view the session.
Locate the active session you wish to view.
Click the View option in the ACTIONS column. A permission request displays on the user’s desktop.

If the user grants permission, a shared session (view only, no remote control) will open in a new browser tab.
When finished, simply close the tab.
![]() The View option is available only for sessions with a STATUS of Active.
The View option is available only for sessions with a STATUS of Active.
Export Session Data
Click Export
The ‘Select Range’ dialog displays.

Specify the From (starting) and To (ending) dates for the period for which you wish to export session data.
Click Apply
A confirmation message shows at the top of the screen.
The selected file is downloaded to the “Downloads” folder on your local device.