Creating a group
Groups are used to assign desktops and configure functionality for a subset of users. For more information on user management, visit the articles on creating and editing users.
Use the information in this guide to learn how to:
- Enter the group profile
- Add the group’s users
- Add the group’s desktops
- Configure desktop features
- View network objects
Create a group
New groups can be created at the parent or child level.
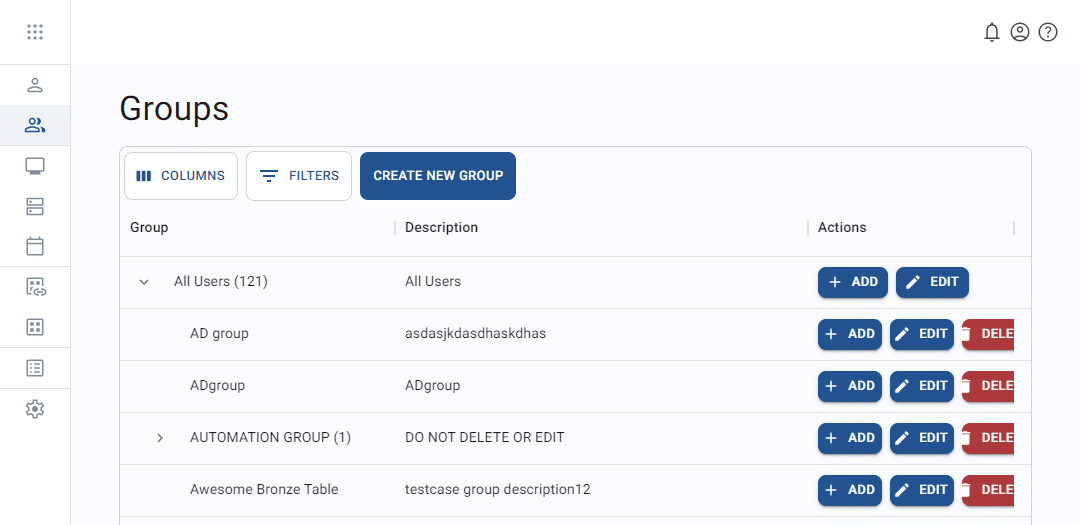
To create a new parent group, click create new group from the top of the Groups screen. If you wish to create a child group instead, click + add from any existing group. Enter any necessary values and then click save changes to submit.
Each group record contains the following sections:
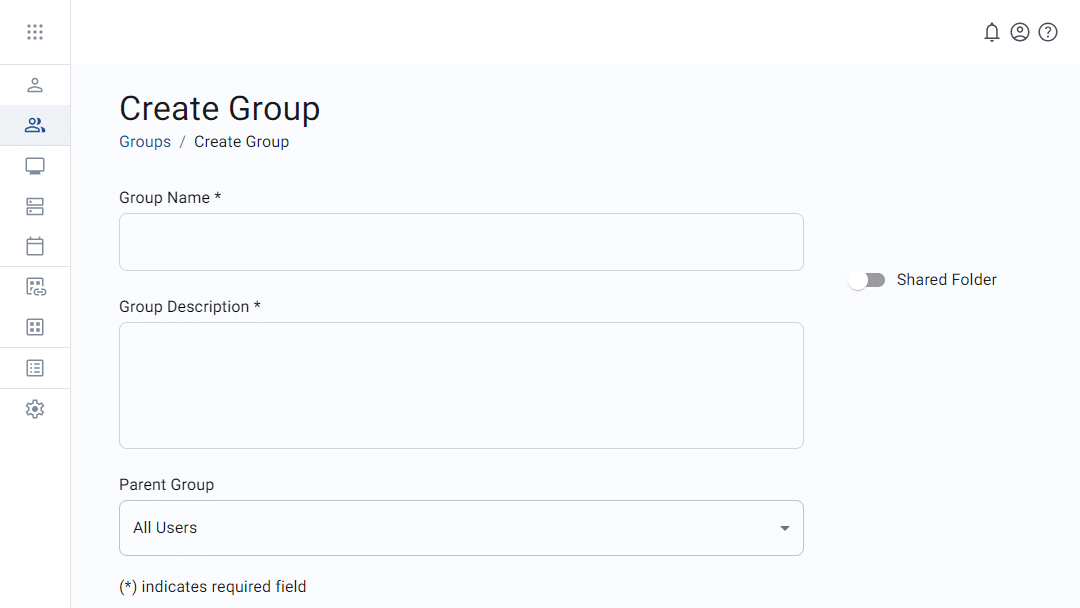
Enter the group profile
All groups may be either parent groups or child groups. A parent group is shown in the previous image, and the image below shows a child group.
The table below shows the values that make up a group profile
| Field | Datatype | Required? | Notes |
|---|---|---|---|
| Group name | String | Yes | |
| Group description | String | No | |
| Parent group | Lookup value | Conditional | This field appears only if the group is a child of (or nested under) another group. |
Additional features in this section:
- Shared folder
- Switching this setting ON triggers the creation of a shared folder for all members of the group.
- Switching this setting OFF deletes the shared folder.
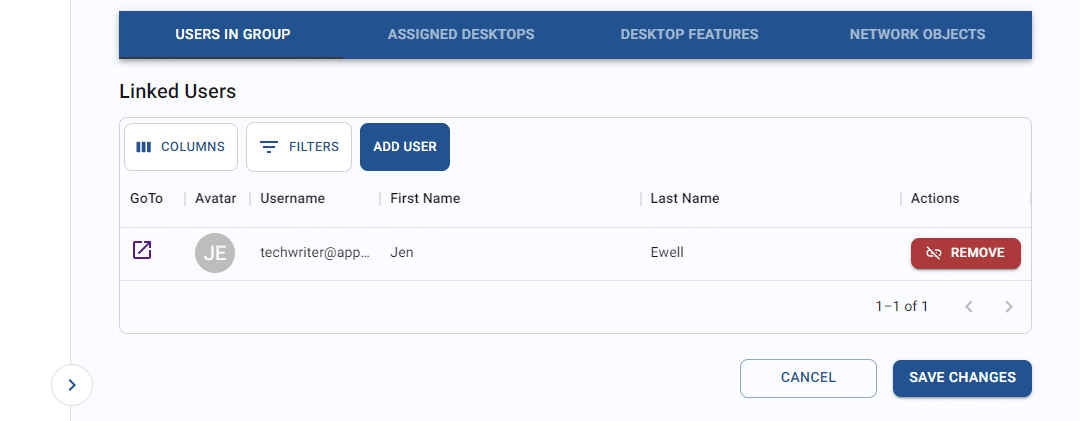
Add the group’s users
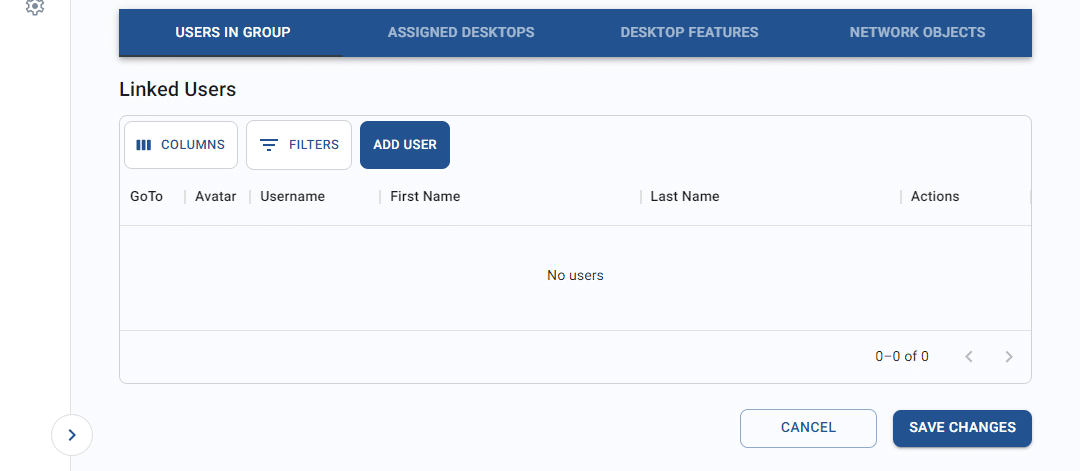
At the bottom of the Create group page, you may view the roster of users that are assigned to the group. For information on how users are assigned to groups, see the article on editing users.
To assign a user to the group, follow the steps below:
- From the “users in group” tab, click add user.
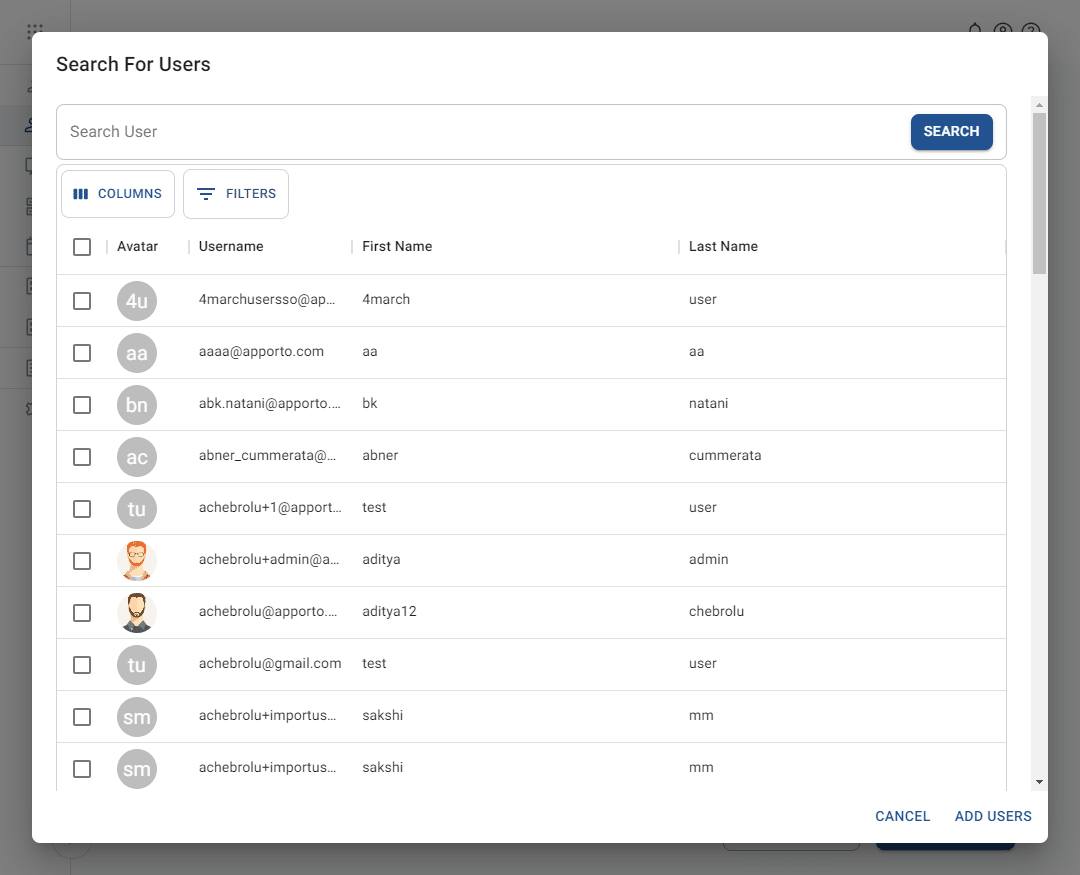
- The system will display the Search for users pop-up. To make it easier to locate the appropriate user, you may update the view of the users list. See the article on working with lists for more information.
- From the list, check one or more checkboxes to select users for the group.
- Click add users. The system will close the pop-up.
- The newly linked users will display in the tab. Click remove to remove any unwanted users.
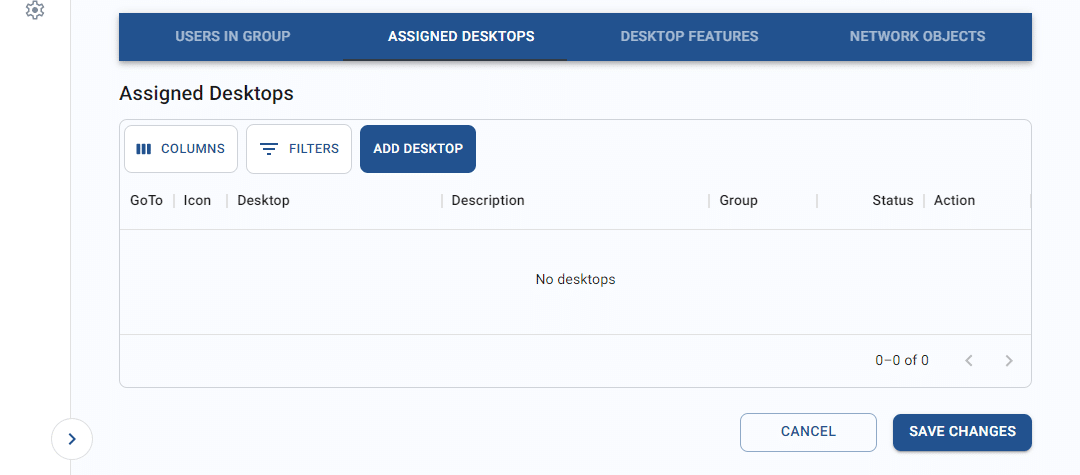
Add the group’s desktops
The second tab in the bottom section displays desktops that are assigned to the group.
To add a desktop, follow the steps below:
- From the “assigned desktops” tab, click add desktop.
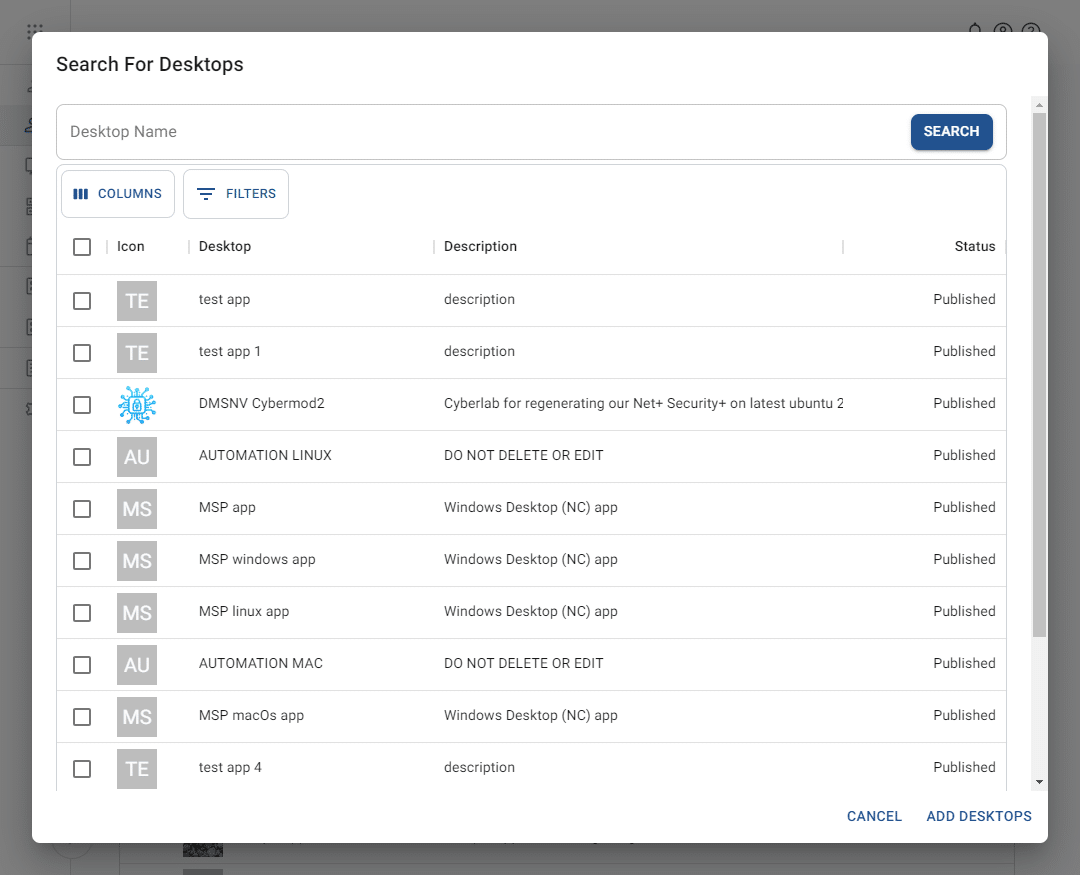
- The system will display the Search for desktops pop-up. To make it easier to locate the appropriate desktop, you may update the view of the desktops list. See the article on working with lists for more information.
- From the list, check one or more checkboxes to select desktops for the group.
- Click add desktops. The system will close the pop-up.
- The newly linked desktops will display in the tab. Click unlink to remove any unwanted desktops.
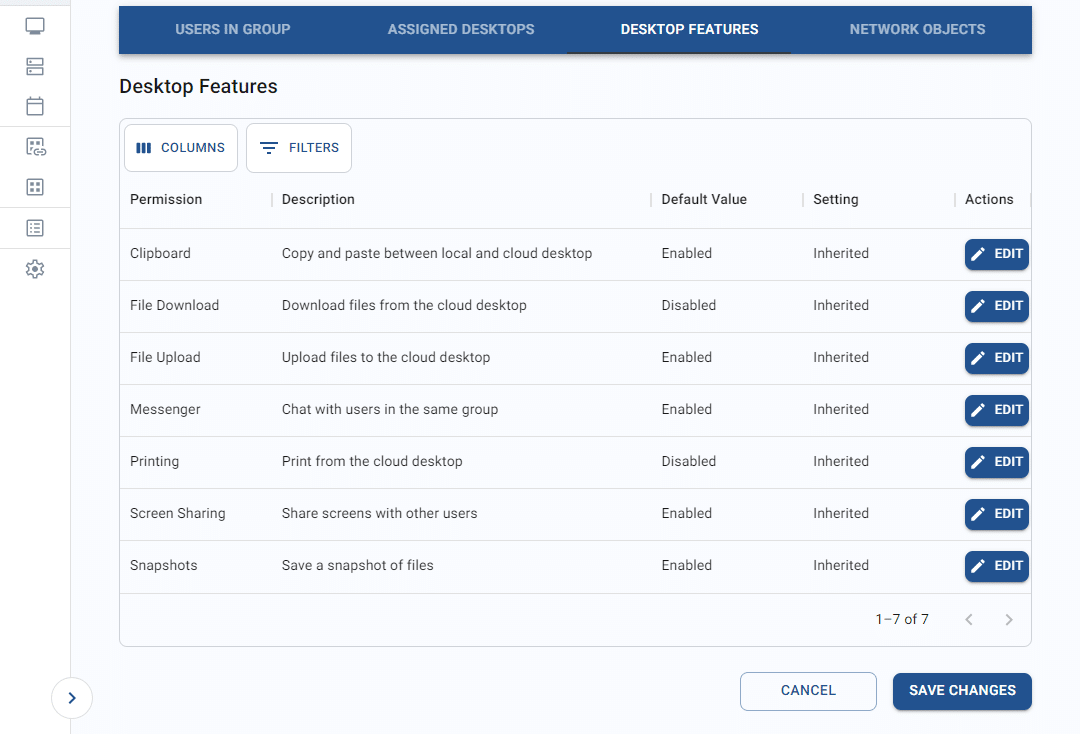
Configure desktop features
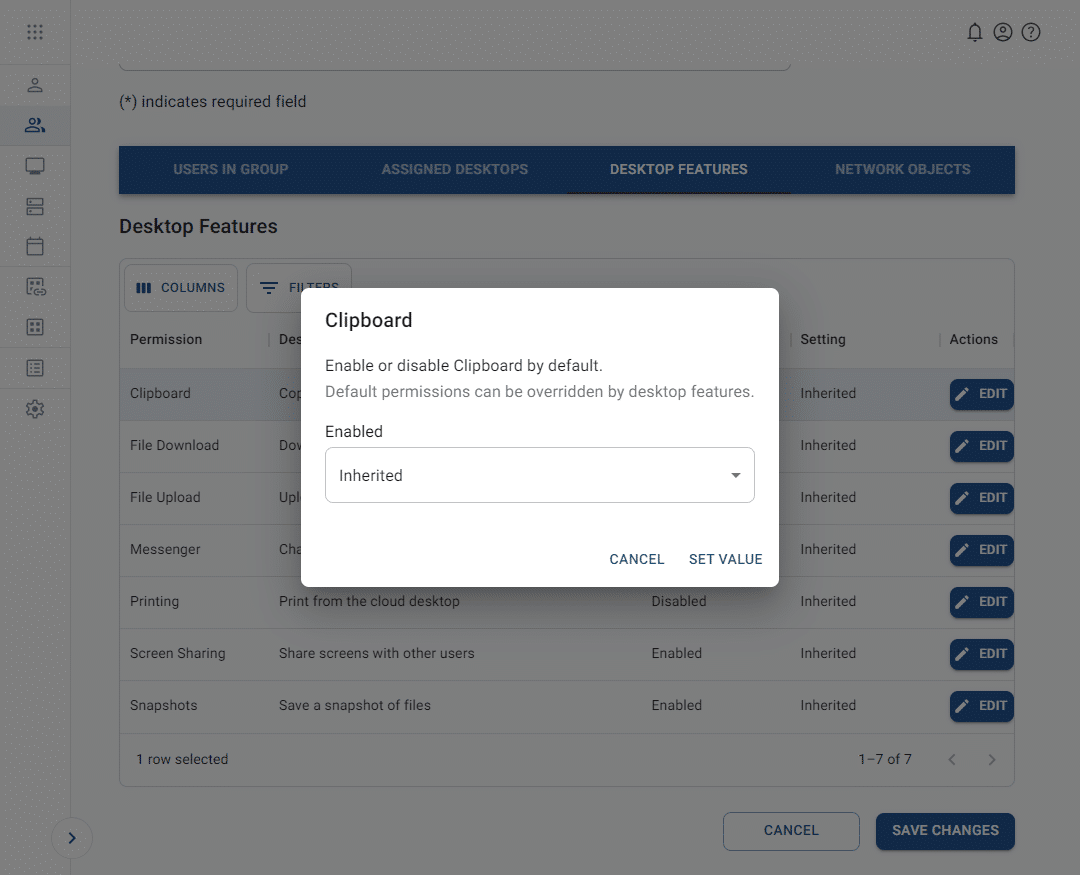
A number of desktop settings can be configured specifically for the group.
To edit a feature setting, follow the steps below.
-
- From the list, click edit on a desktop feature to change its setting. This will trigger the edit pop-up. To make it easier to locate the appropriate desktop feature, see the article on working with lists.
- To use the default value for the feature (as configured in the Settings section), choose the “Inherited” option from the dropdown. Otherwise, select “Enabled” or “Disabled” from the setting dropdown.
- Click set value to save.
- The updated setting will display in the settings list.
- From the list, click edit on a desktop feature to change its setting. This will trigger the edit pop-up. To make it easier to locate the appropriate desktop feature, see the article on working with lists.
View network objects
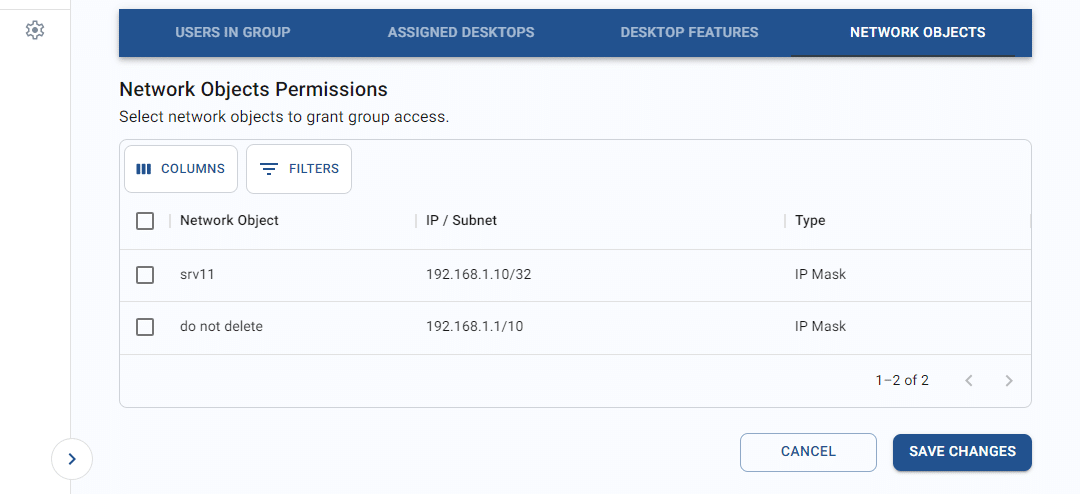
The fourth tab provides settings for network objects. For security purposes–such as Zero Trust Access initiatives–you may wish to limit network access. Network objects allow you to control which IPs or IP ranges may be accessed by a group of users. This feature is only available with the Apporto Zero Trust Desktop. Contact [email protected] to learn more about this product.
To make it easier to locate the appropriate network object, you may update the view of the network objects list. See the article on working with lists.
To grant the group access to a network object, follow the steps below.
- Check the checkbox next to the desired network object.
- Click save changes to commit the change. All users in the group will now be associated with that network object.

