Creating an app or desktop
The process of creating an app or virtual desktop in Apporto NextGen includes the following prerequisites.
- Creating a resource group to render apps/desktops in a browser and provide storage for users to upload and download files.
- Creating a server pool to host the workloads of the apps/desktops.
- Creating a desktop pool. This will enable your desktop or app to be accessed across multiple regions/data centers or if you need to support cloud bursting.
Once the above steps are completed, you can follow the steps below to create an app or desktop. Use the information in this guide to learn how to:
You may also visit the related articles on viewing and managing apps and desktops.
Create an app or desktop
To begin creating an app or desktop, follow the steps below.
- Log in to the system using your credentials.
- Click apps and desktops or the
icon in the navigation panel.
- The list of apps/desktops will display. You may filter the list or adjust the displayed columns to locate records. See the article on working with lists for more information.
- Click create app/desktop. The system will direct you to the Create app/desktop page. Fill in each relevant sections for the desktop application and then click save changes to submit the form. The sections are listed below.
Create the app/desktop profile
The first section in the Create app/desktop screen covers basic information.
The table below shows the values that make up the user profile.
| Field | Datatype | Required? | Notes |
|---|---|---|---|
| App/desktop name | String | Yes | A name that your users will recognize (e.g. CAD desktop) |
| App/desktop description | String | Yes | Long-form description of the app/desktop |
| App/desktop pool | Lookup value | Yes | Select from the list of desktop pools available to you. |
| App/desktop type | Lookup value | Yes |
|
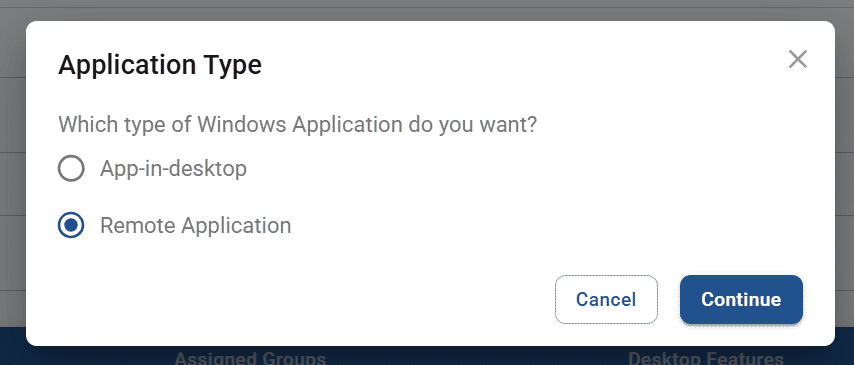
| Application type | Lookup value | Conditional | If the selected app/desktop type is “Windows application,” the following options are available:
|
| Icon | Image | No | The icon appears throughout the system where the app/desktop is referenced. Accepted formats include JPEG and PNG. A ratio of 1:1 is recommended (e.g., 100 x 100 pixels). Otherwise, your image will automatically be cropped or resized. |
| Published (status) | Boolean | No | By default, the app/desktop will be published. |
Link server applications
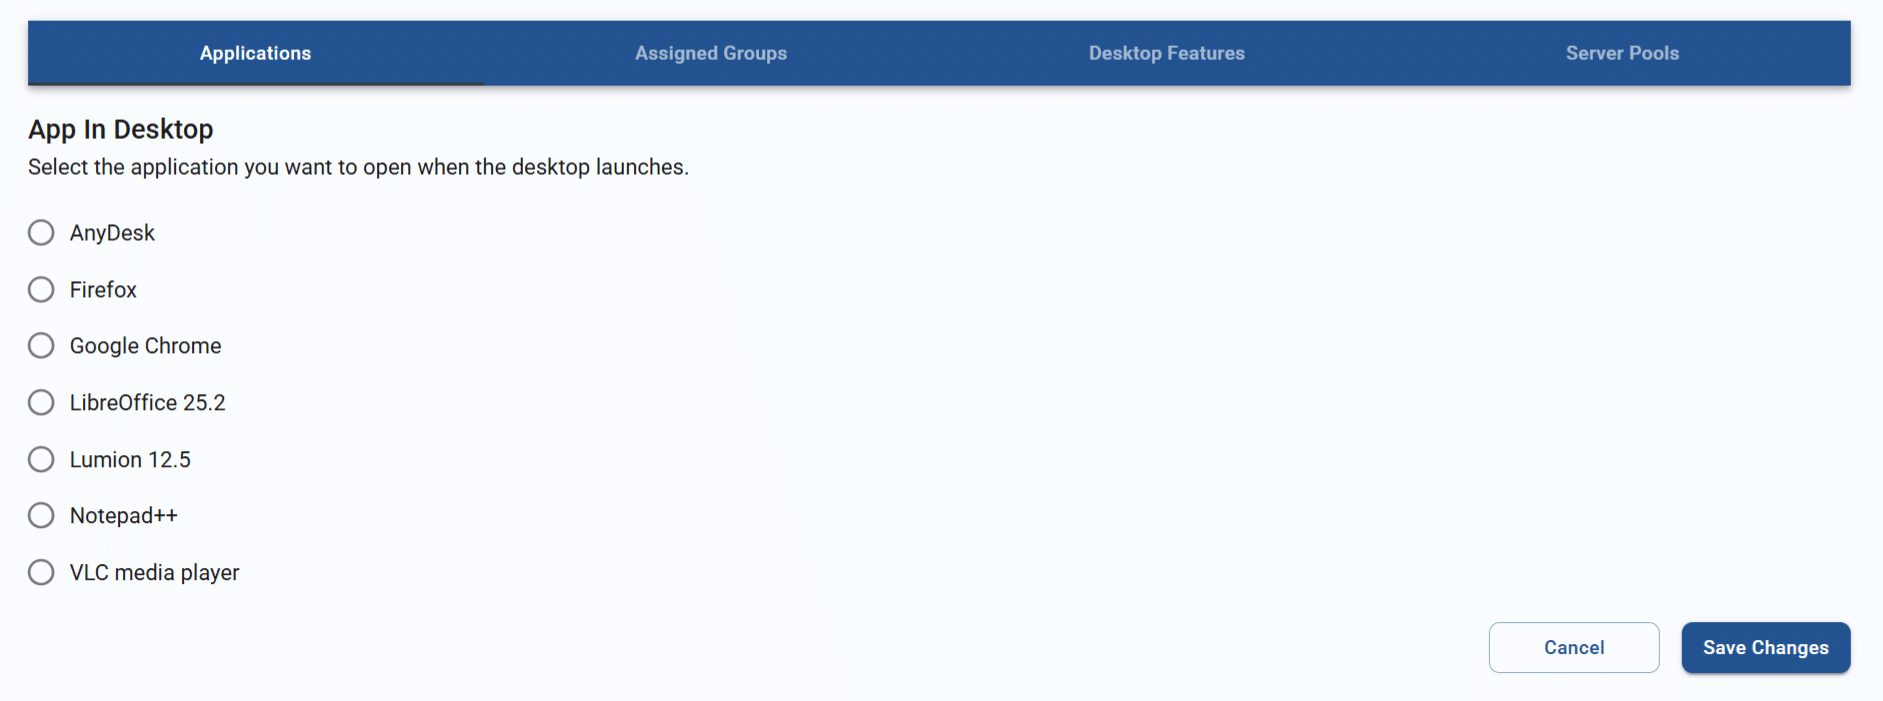
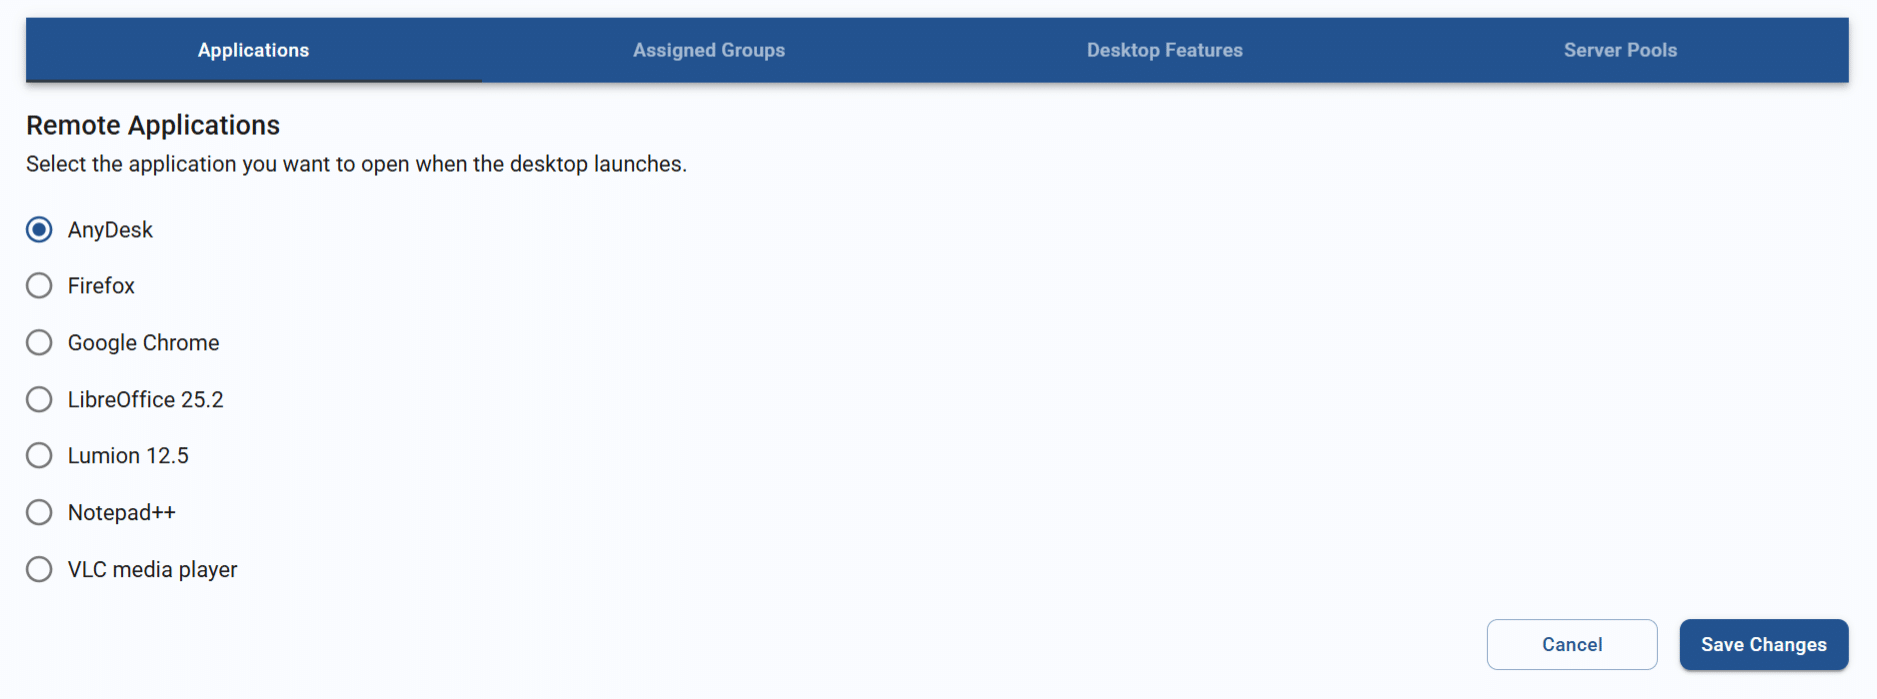
If you are creating a Windows application, the “Applications” tab will be visible at the bottom of the Create app/desktop page.
- If your selected application type is “App-in-desktop,” then applications installed on the servers related to your desktop pool will display. Select the one you want launched through Apporto, and click/tap save changes. The app will be accessible within a virtual desktop.
If no server applications are detected, an error message will display. Once applications are installed, the app/desktop profile can be edited to select the desired application. See the article on managing apps and desktops for more information.
- If your selected application type is “Remote application,” then applications installed on the servers related to your desktop pool will display. Select the one you want launched through Apporto, and click/tap save changes. The app will be available within a remote app launcher menu.
If no server applications are detected, an error message will display. Once applications are installed, the app/desktop profile can be edited to select the desired application. See the article on managing apps and desktops for more information.
Link the app/desktop to groups
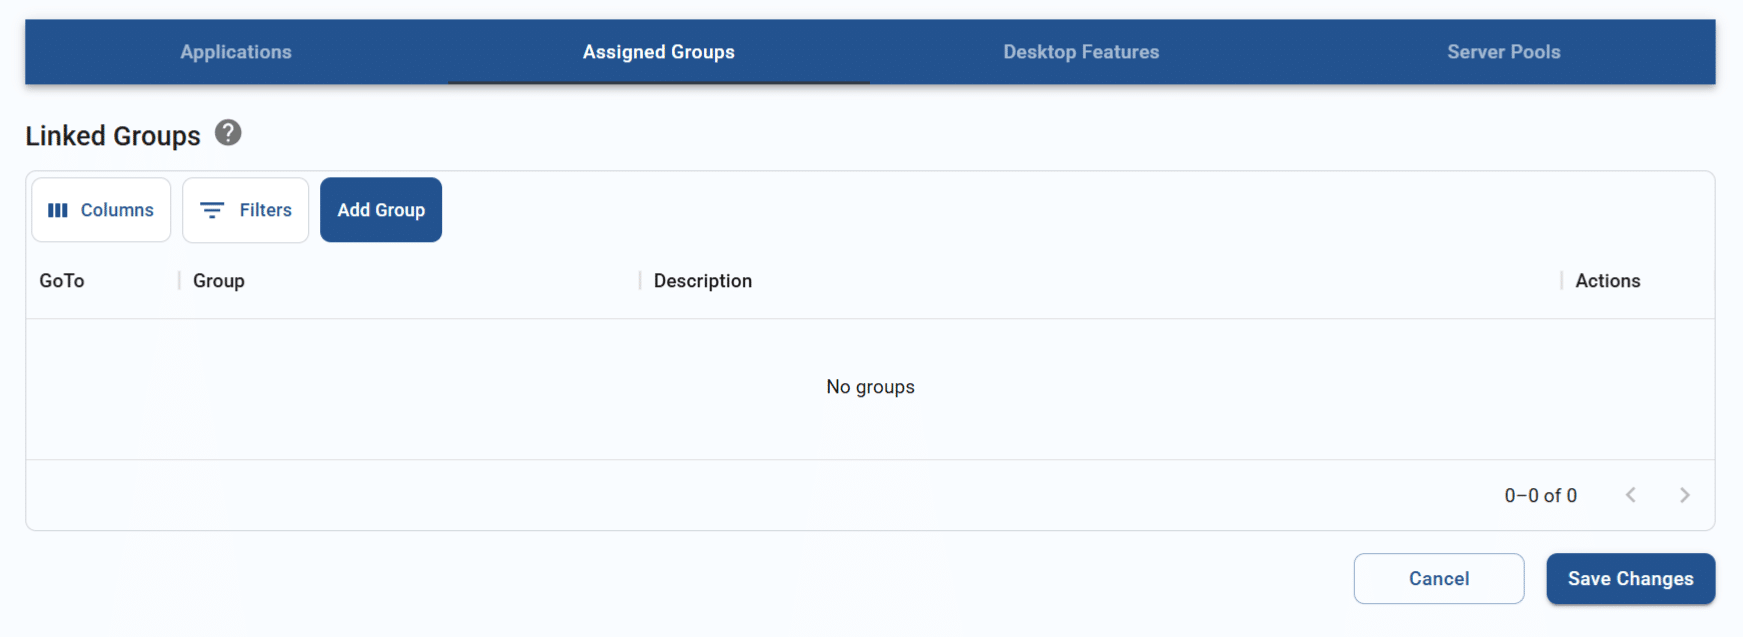
At the bottom of the Create app/desktop page, you may link the new app or desktop to existing user groups. This will enable the users who are members of the group to access it.
To assign the app/desktop to a group, follow the steps below.
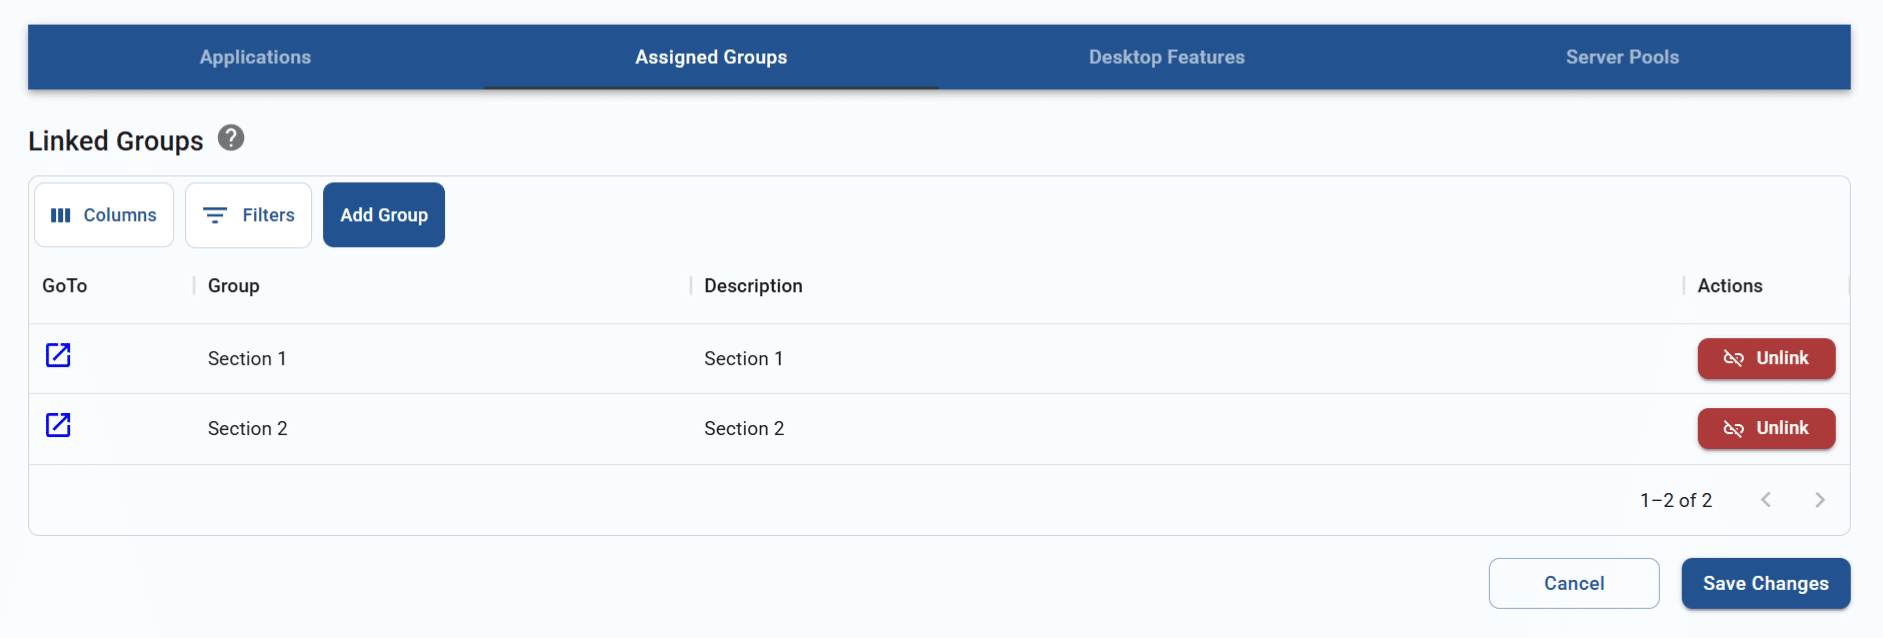
- From the “Assigned Groups” tab, click add group.
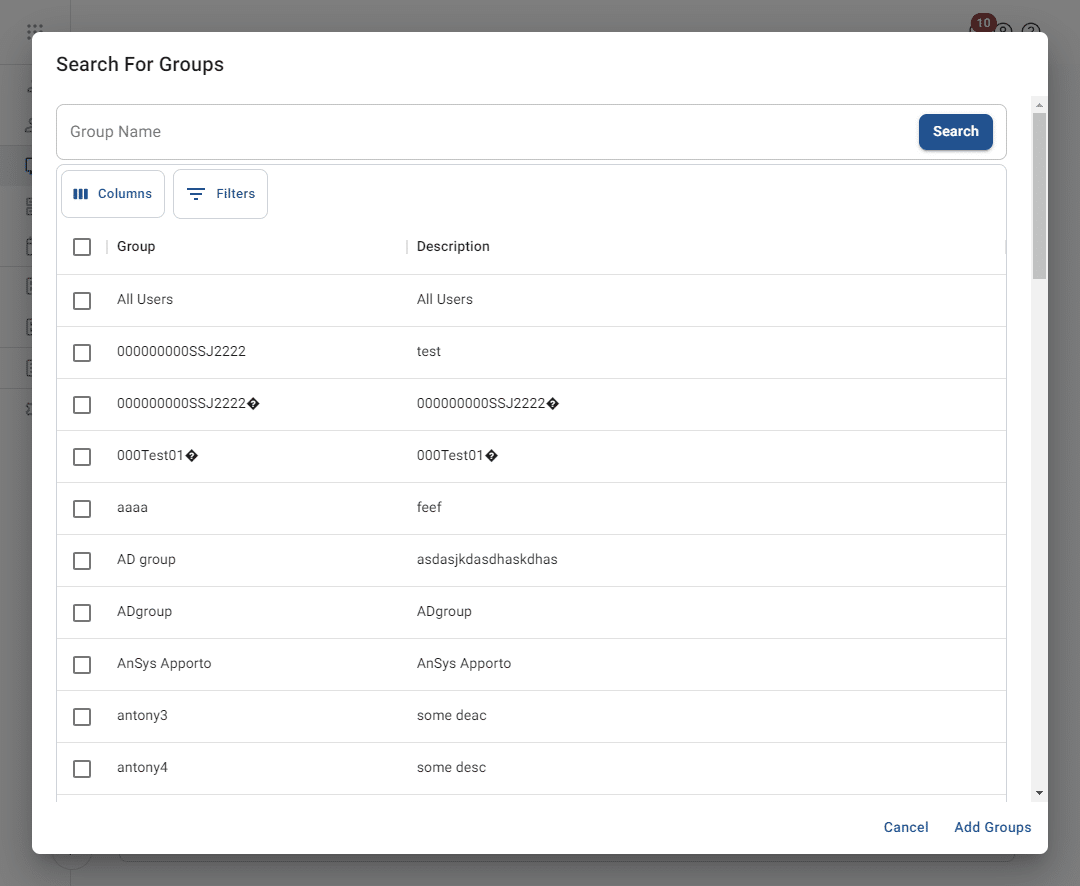
- The system will display the Search for groups pop-up. To make it easier to locate the appropriate group, you may adjust the visible columns or filter or search through the list.
- From the list, check one or more checkboxes to select groups for the app/desktop.
- Click add groups. The system will close the pop-up.
- The newly linked groups will display in the tab. Click unlink to remove any unwanted groups.
Configure app/desktop features
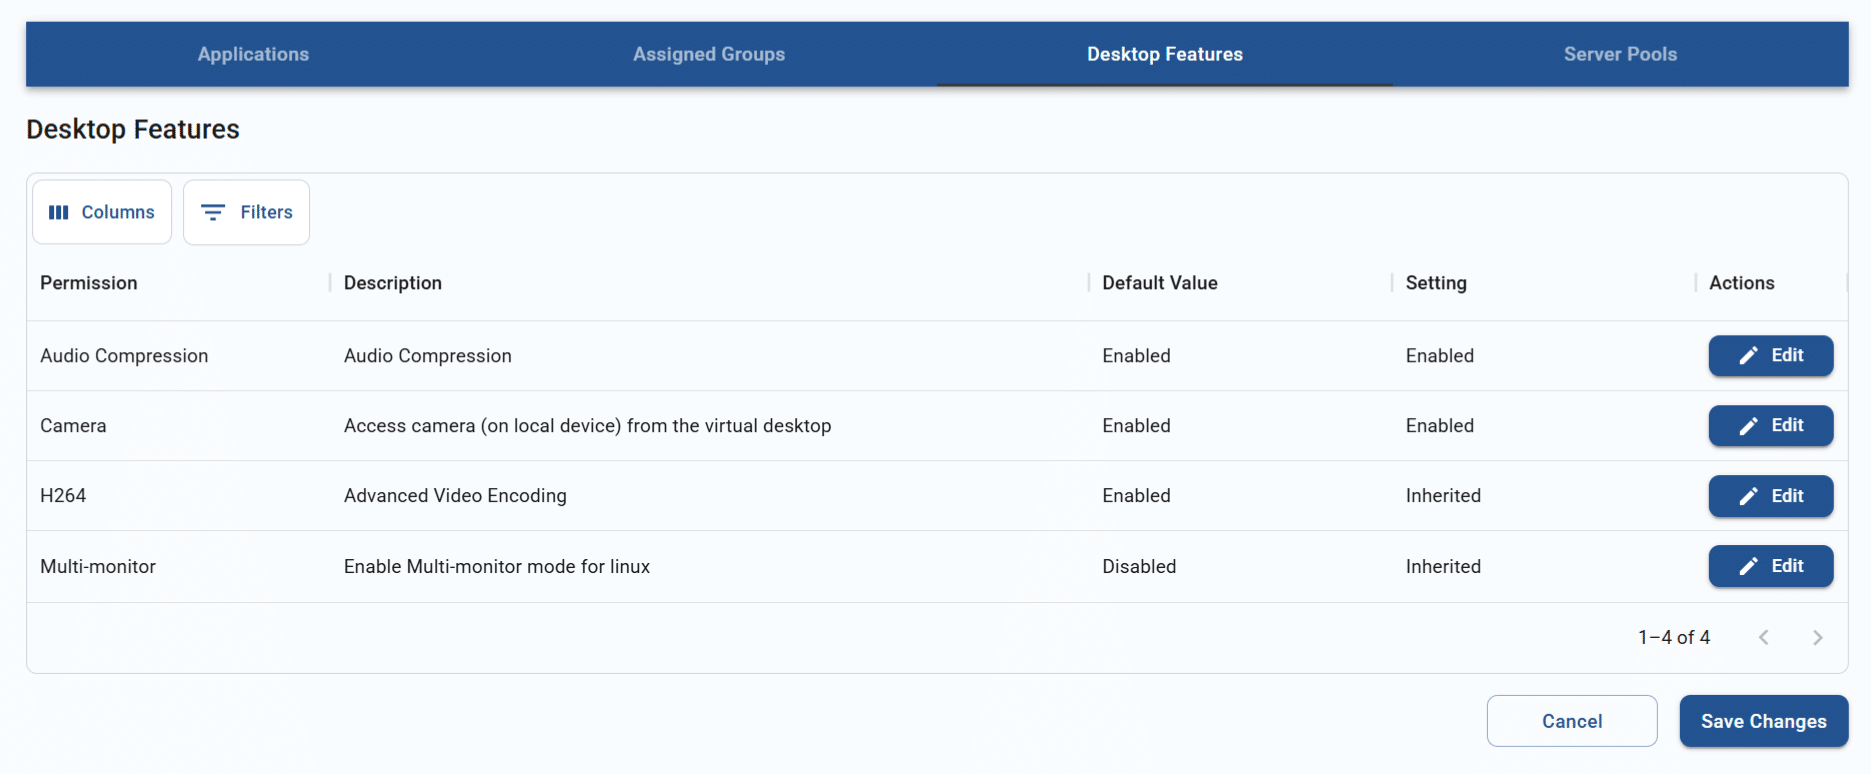
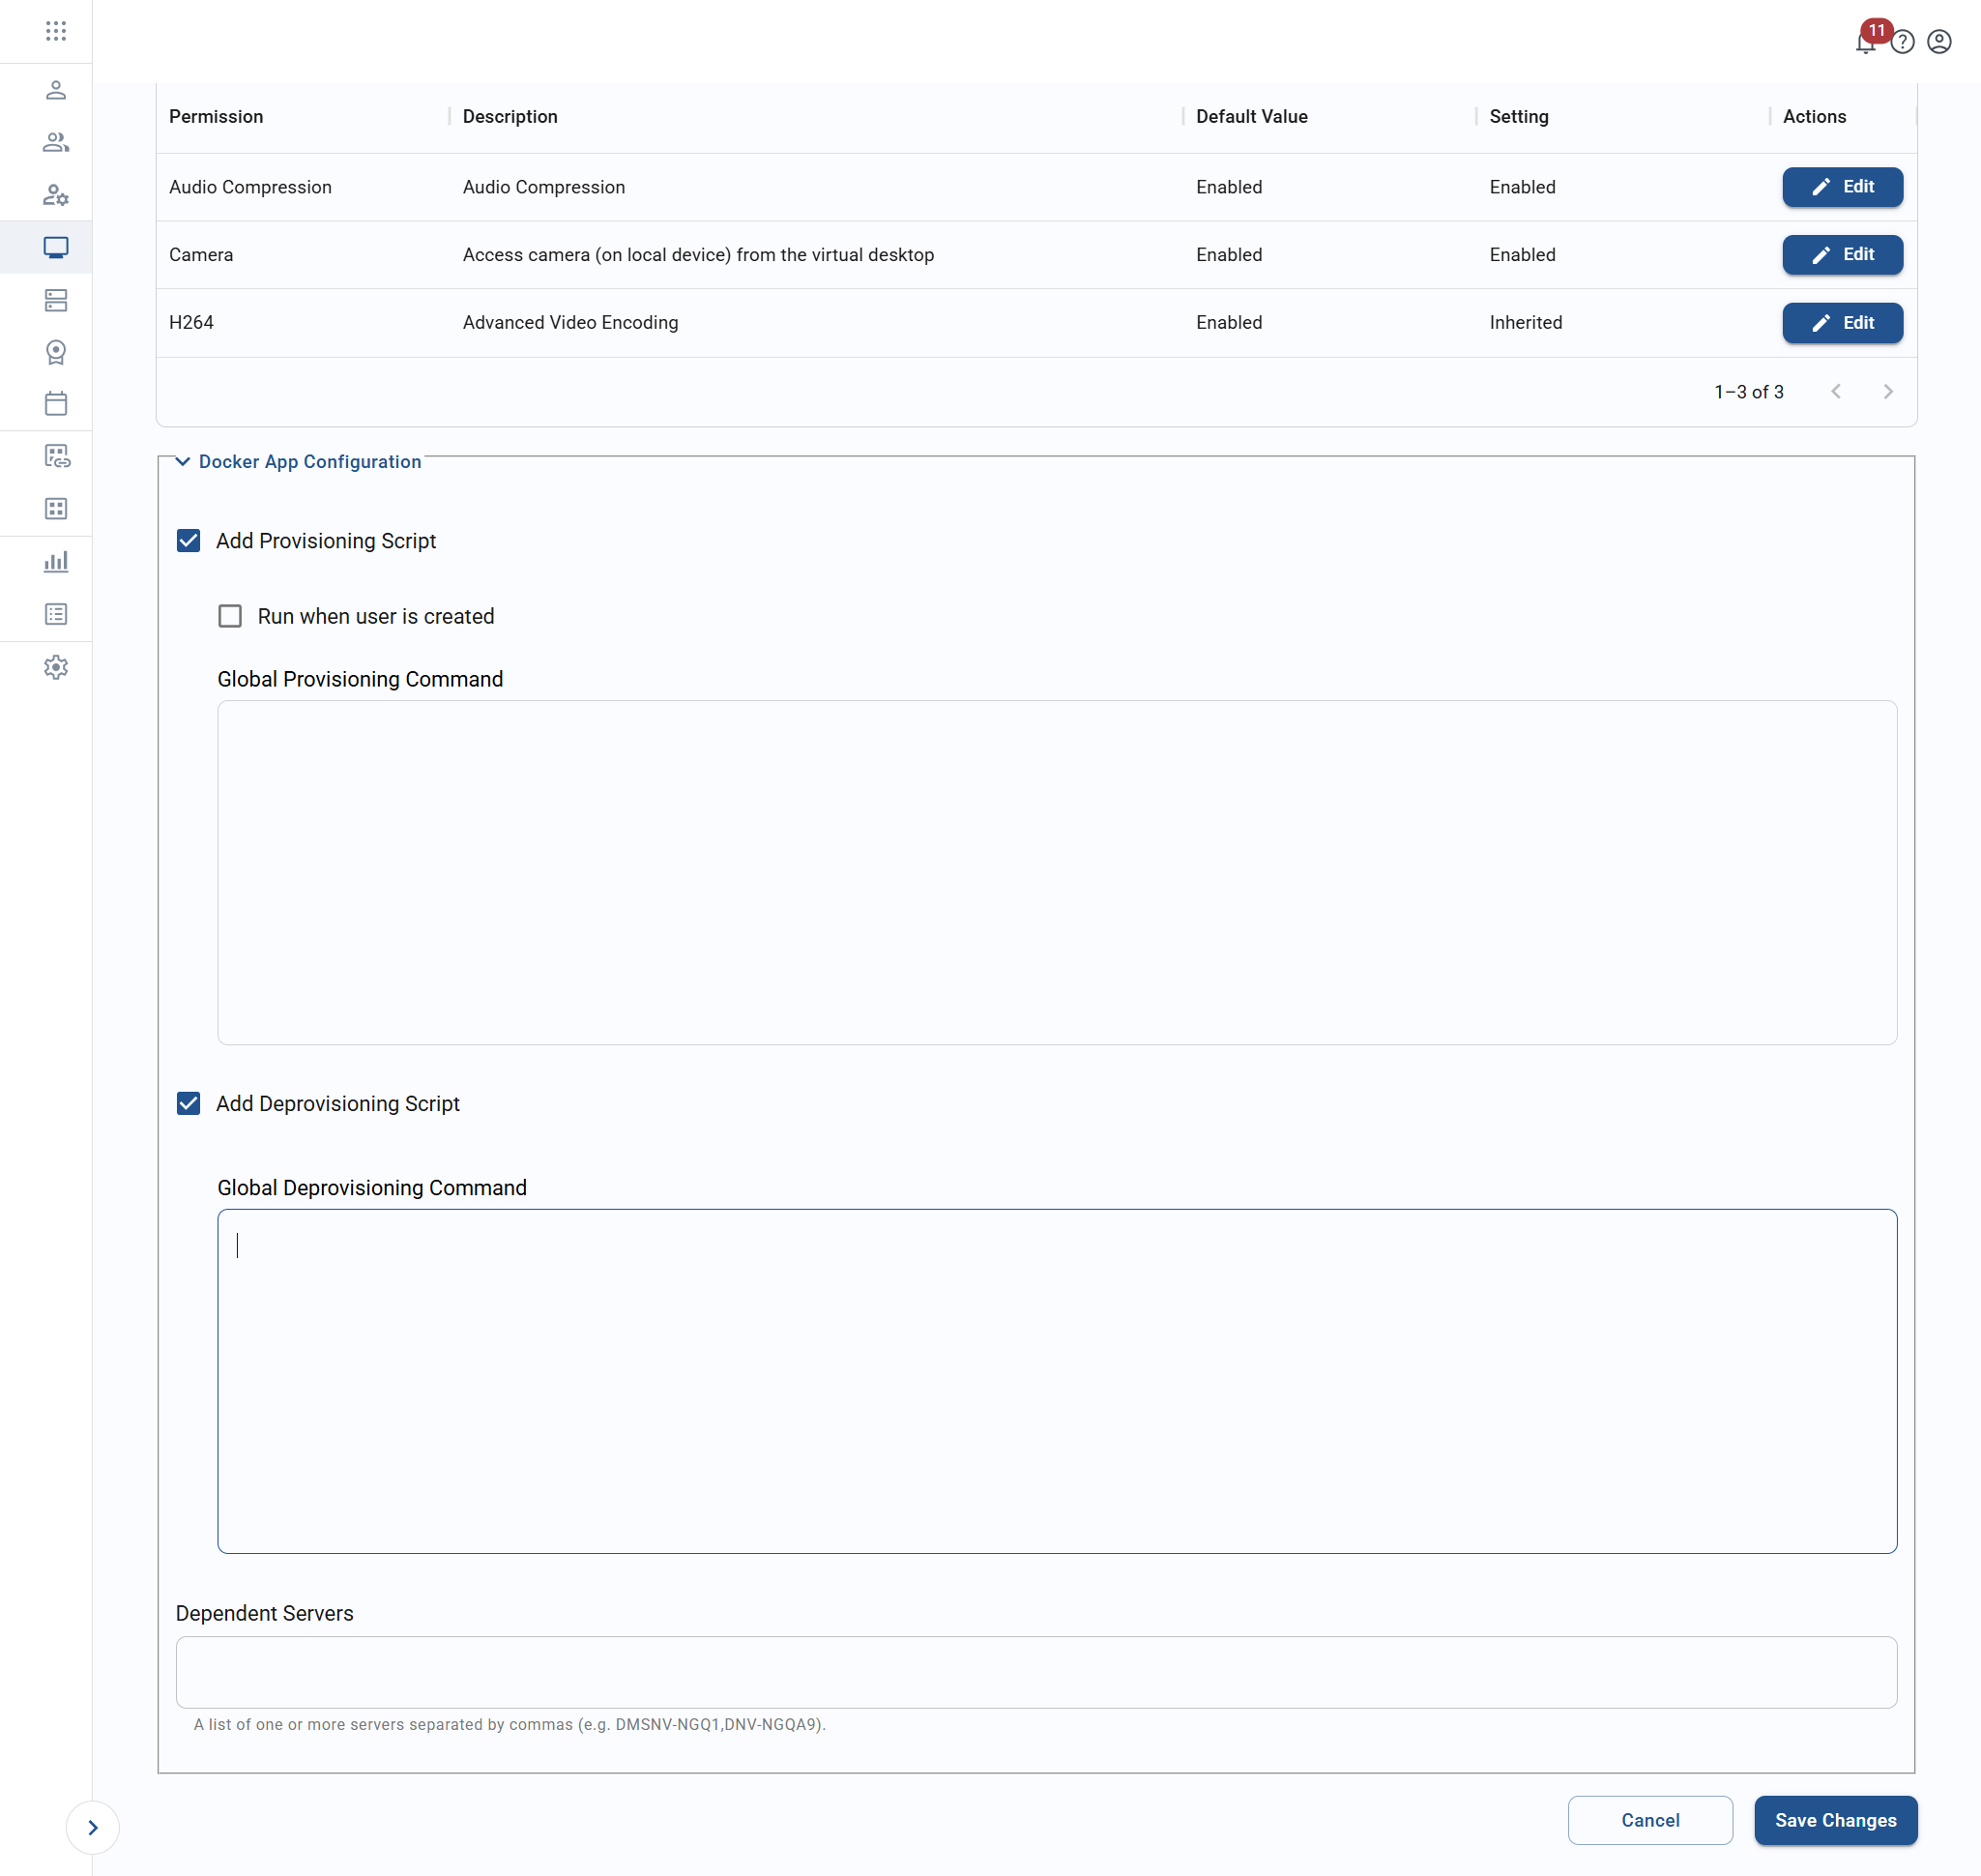
A number of settings can be configured specifically for the app or desktop. Those settings can be used to improve the user experience or improve the security posture. When first opening the “Desktop Features” tab on the screen, the default settings will display. You may update your view of the list by adjusting columns or filtering contents.
To edit a desktop feature setting, follow the steps below.
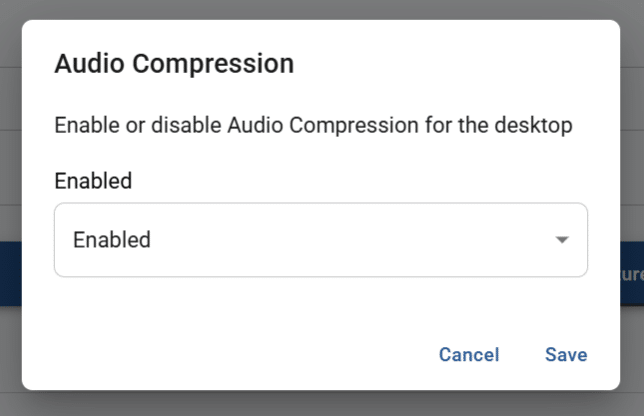
- From the list, click edit on a desktop feature to change its setting. This will trigger the edit pop-up.
- Select a new value from the setting dropdown and click set value to save.
- The updated setting will display in the settings list. For more details on desktop features, visit the article on configuring desktop features for your Apporto instance. Not all desktop features will be available for each app or desktop.
- For Windows and Linux desktops, additional fields are provided for Docker configuration.
- Click/tap save changes after any items in the “Desktop Features” tab are updated.
View linked server pools
Apporto will automatically retrieve any server pool associated with the selected desktop pool and display its information in the “Server Pools” tab. No action is required.
Clone an existing app or desktop
In addition to creating a desktop or application from scratch, you can clone an existing one. This is especially helpful if multiple app/desktops will use similar settings.
To clone an app or desktop, follow the steps below.
- From the Apps and desktops page, click clone for the item you would like to copy.
- The system will direct you to the Clone app/desktop page, which has the same fields as the Create app/desktop page.
- By default, all form values are the same as on the original app or desktop, with the word “Copy” appended to the name. You may change any desired values. See the section on creating apps and desktops for more details on each form field.
- Click save changes to finish the cloning process. The new app or desktop will now appear in the Apps and desktops list.


