Innovative Solutions. Inspired by You.
All from an employee-owned company dedicated to your success.
Trusted by:


Gartner 2025 DaaS Magic Quadrant

2.5M Desktops
-
Business
Enable a more secure hybrid workforce
-
Education
The future of learning is here
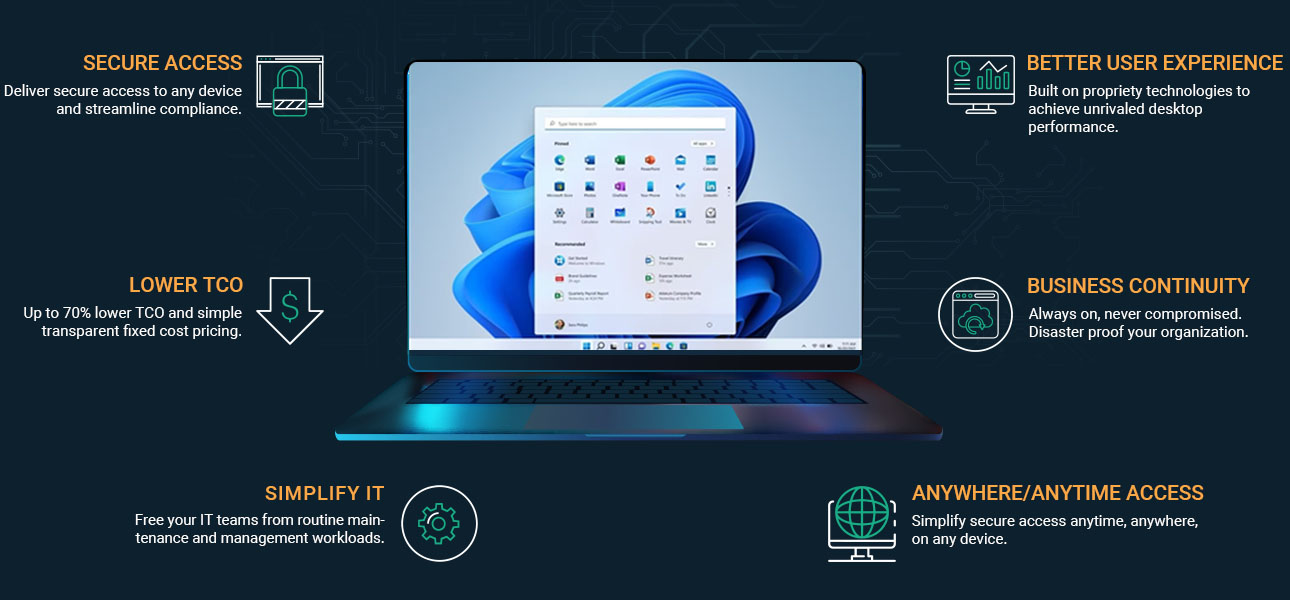
The Desktop You’ve Been Waiting For
Empower your IT and quit worrying about infrastructure and endpoints. Deliver a better, more secure, desktop experience users will love.
Solutions
The perfect blend of technology and innovation to deliver purpose-built solutions unlike any other
Digital Workspaces
A radically simplified and less costly solution for securing remote work without VDI or having to lock down every device.
Cybersecurity Labs
Transform your cybersecurity training with pre-built courses, effortless customization, and 24/7 remote access for unparalleled learning flexibility.
Virtual Computer Labs
Enhance student access to essential resources across all devices, anytime and anywhere, while significantly cutting total costs by 50-70% and allowing your IT team to prioritize key initiatives.
Common Use Cases
The perfect fit without the hassle of complex infrastructure or integrations
-
Virtual Labs & Classrooms
-
Zero Trust Cloud Desktop
-
Cybersecurity Lab
-
Remote & Hybrid Work Solutions
-
Secure Help Desk
-
Remote Engineering